 SCORPIO SR-i500 SECURITY SYSTEM
The very nature of the motorcycle leaves it vulnerable to all kinds
of mischief, and when you have one that costs as much as the ST1300, you
should protect it. One such system to use is the Scorpio SR-i500 model,
which tends to be the top of the line motorcycle alarm you can get.
You can read more of the details about it
here.
While an alarm system is no great new thing in the realm of vehicle security,
the 2-way FM communication of this system is. It claims to have 1/2 mile
range (expect 1/4) to
alert you of situations. So, the key here is that the alarm doesn't just
whine for people to ignore like they ignore every car alarm everywhere, but
it alerts you via the keychain (noise and/or vibration) that it just went
off. Also, it tells you exactly which trigger set it off (bumping, tilting,
perimeter alarm, battery cut, ignition tamper). Even better, you can have
the alarm be completely silent, and only alert you through the remote. This
way you could catch someone in the act of tampering with your bike.

The basic system comes with the sensor unit (which detects bump and tilt),
the keychain remote and all the wiring parts you need. The small unit itself
installs anywhere you have some space on the bike. Most will choose to do
it under the seat. You can also add the following features to the system:
- Battery backup - in case the battery power gets cut
(cannot be retrofit, must be bought with the initial system)
- Perimeter sensor - senses movement around the bike, triggers
the alarm after three warnings
- Ignition kill - allows you to remotely kill the ignition if you get hijacked
The perimeter sensor is nice, but if you expect people to walk by it often,
it can be very annoying (to both you and them). This is kinda like those
car alarms that say "you are standing too close to the vehicle." This one just
chirps, but same principle. This is a good setting if you want to keep
it somewhere people will be unlikely to come within five feet of it.
The ignition kill is neat, because in the unlikely
event that someone takes off on your bike with you around, you can kill
the ignition. Actually, it screams for 20 seconds, then it shuts
down the engine and fires the alarm. The secondary feature of the ignition
kill is that if the system is armed, the ignition is effectively cut-off.
If someone actually tries to start the bike, key or otherwise, the alarm
will then go off.
The system has "plug and play" harness kits available for most models of
motorcycles, except the ST1300 is not included. This means you have to
tap directly into the wiring to hook it up with the generic harness.
It's not difficult, but it can be daunting messing around with the
wires that keep your baby running.
To access the wire bundle, you need to access the master wire bundle. This
is the black "bar" that is wrapped in electrical tape. It's underneath
the seat over the rear gas tank. Once you take off
the tape, you're left with the plastic cover plate and a bunch of colored
wires. For identifying wires, ignore the little silver rings. You just
care about the color of the wire itself and any colored stripe it has on it.
Simply match up the following wires to the generic harness
- Gray Wire (either one) on generic harness - Light Blue wire on ST1300 (R turn light)
- Gray Wire (the other one) on generic harness - Orange wire on ST1300 (L turn light)
- Black Wire on generic harness - Green wire on ST1300 (ground)
The Orange wire on the generic harness connects to the tail light wire on the
ST1300. The instructions incorrectly tell you to use the solid brown wire
for Honda bikes. This is not the one you want for the ST1300.
The wire you do want depends on the
year of your bike. If it's 2003, you want the Brown+White Stripe wire.
If it's a post-2003 bike, you want the Black+Brown Stripe wire.
Yes, they
changed it from the 2003 and "beyond 2003" models - consult the wiring
diagrams in your service manual for more info. You did get a service
manual right? You can pick them up from your dealer for $60-$70, but
I'd suggest ebay, it'll be much cheaper. Don't bother calling customer
support because a) they are pretty ignorant about the ST1300 and b) they
seem to be a bunch of boobs that don't feel the need to return phone
calls for the $400+ system you just bought from them.
Connect the wires according to the instructions using the supplied wire
splicers. Use your fingers to connect the splice and a pair of slip-joint
pliers to firmly, but gently lock them into place. After that, plug them
in and seal up the entire bundle with electrical tape (if you're installing
the ignition kill also, don't wrap it up just yet). Don't worry about
being too bulky, there's more room under the seat than you think.
For the remaining wires coming from the unit, the one with the in-line fuse runs
to the battery + terminal. The other is the antenna. All you need to do
for that is drill a small hole somewhere inconspicuous, pull the wire through
and let it dangle. Just make sure it doesn't dangle into the rear wheel
or anywhere similarly bad.
If you do get the perimiter sensor, it just plugs into the unit.
You then place (stick with velcro) the little sensor box somewhere
under the seat. For the ignition kill, it plugs into the unit as
well, but you need to also find the the Black+White Stripe wire
(ignition), splice it with the parts included and mount the
small box. Yeah, do this before you wrap the wire bundle back up.
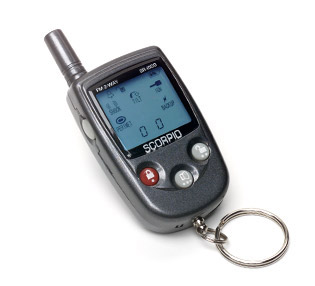
Overall the system operates well, and I like it very much. I would have
preferred to have more buttons on the remote unit though,
if only because it's easy to forget all the
key combinations you have to do to perform certain actions. For example,
I hope that during the panic of
a hijack I'll have the presence of mind to remember I need to
hit buttons 1 and 2 at the same time to enable the ignition kill.
Also, the remote housing is cheap as hell. Haven't these guys seen
a modern remote-access car fob?