 CHANGING THE AIR FILTER
Changing the air filter is one of the two most cost-effective ways of increasing the life
and maintaining the performance of your motorcycle (the other is changing the oil).
This is an easy maintenance procedure, and it only takes about 15 minutes. The only difficulty
comes in that you need to go through a bit of a hassle to actually get to the filter.
Before you begin, have the following tools available:
- 8mm deep socket (I use a 1/4" ratchet with an 3" extension bar and a universal joint) It helps
to prevent scratching the tank as you ratchet
- 10mm deep socket (I use a 3/8" ratchet with a 3" extension bar)
- #2 phillips screwdriver
- Magnetic parts tray
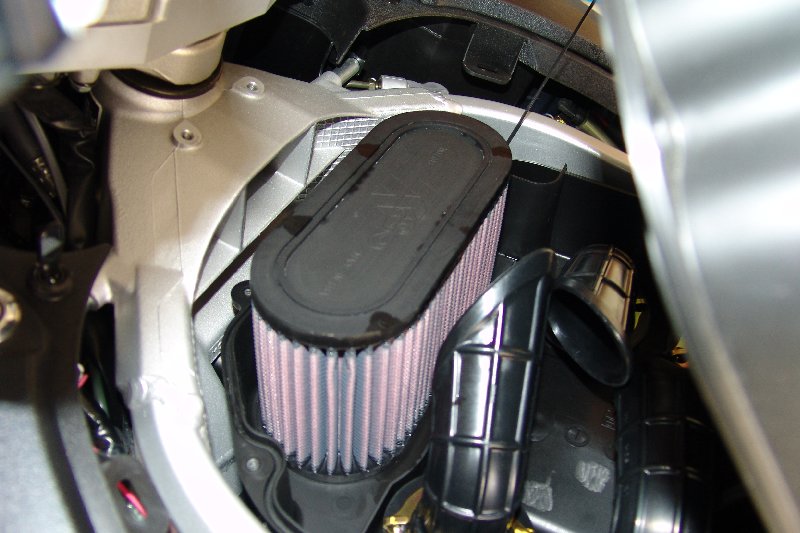
What air filter to get? K&N's filters tend to be the best in my opinion (and opinions do
vary) and I use them on all my vehicles regardless of the number of wheels. They don't just use
physical filtering in the form of micro holes, but also coat their filters with oil, which helps
trap even more dust, while at the same time letting more air flow through. This results in a
tiny bit of increased horsepower, so they claim. They aren't cheap - about $55, so judge for
yourself (model HA-1302 fits the ST1300).
When the time comes, instead of replacing them, you just wash them off and "recharge" them with
a new shot of oil (kit sold separately). I recharge my filters in the spring and in the fall,
otherwise every 5000 miles. Just like changing the oil, you can't really change your air
filter too often.
In general, they are expensive filters, but you only need to buy them once.
Step 1: Lift the tank. Unscrew the 8mm bolts at the top and the 10mm bolt
at the base of the tanks and lift it up as you slide it back.
DO NOT LOSE ANY PARTS DOWN THE BIKE WHEN YOU DO THIS AS YOU WILL
NEVER SEE THEM AGAIN. This includes the two metal collets under the
rubber grommets that hold the 8mm bolts you removed. If you do, here's
the part number (61104-422-000 0692202) to request a replacement
from www.servicehonda.com.
Prop up the tank
with the bar stored in the back. To prop it up, you need to pop out one of the
plastic caps on the handlebar (don't lose it). I use a standard screwdriver to pop
it out - be careful, they scratch easily.
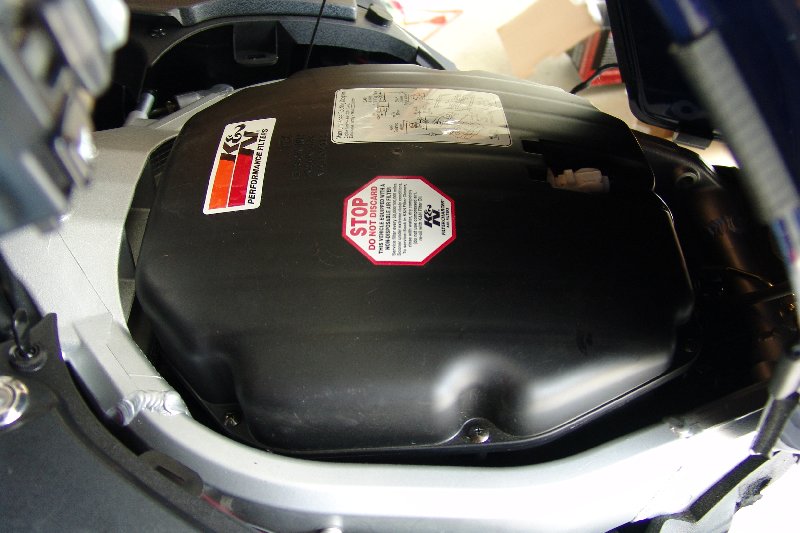
Now take a #2 phillips screwdriver and remove the 9 screws holding down the cover.
Don't lose these screws as you remove them. Leave the two at the top for last as they
are a bit harder to actually remove. Loosen those two, then lift the cover slowly.
As you do this, grab the screws and save them, then lift the cover the rest of the way.
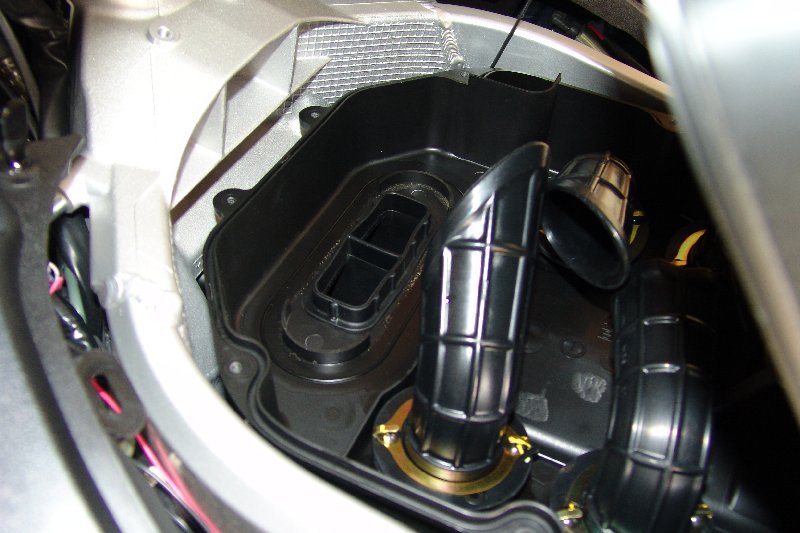
There's the filter. Lift it out, recharge (or replace if you're using a basic one) and
then reverse the steps above and you're done. Again, be VERY careful not to drop things
down into the bowels of the bike throughout the entire process.