 CHANGING THE OIL
Changing the oil and oil filter is the single most cost-effective maintenance you
can perform on your motorcycle. Conversely, not changing the oil regularly is the
single, easiest way to destroy your motorcycle from the inside out.
To start off, the legwork on what oil and oil filters to use has already been done
by this site. This includes break-in
procedures and all kinds of other things. The oil and filters I use came from the
research on that site. Below you will find the simple step-by-step, illustrated
approach to changing the oil on the Shadow A.C.E. 750.
On average, it takes me about 35 minutes
to change the engine oil, replace the filter and lube the chain. Final cost of doing
so runs about $20 in materials. Go to your dealer and ask how much to do the same
work and how long it'll take to do it. Believe me, you too will be changing your
own oil.
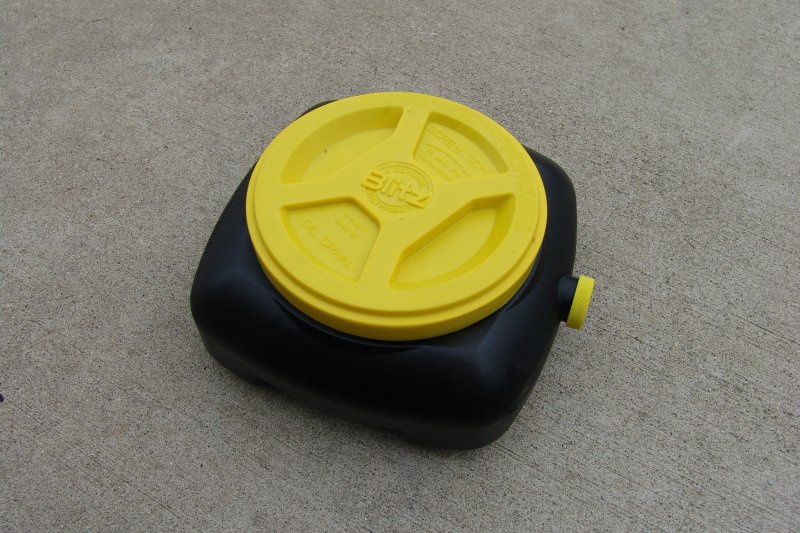
If you don't already have one, get an oil drain pan. This one is $10 at most auto
supply stores. It fits perfectly under the bike and holds all the oil. Once drained,
you can use the spout to pour it into a milk jug or whatever for proper disposal.
Step 1: Warm the oil
Warm up the bike from cold, running it for about 3 minutes. Don't change the oil after
a long ride or you're just going to burn yourself.
Step 2: Remove the oil fill cap
Remove the oil fill cap to provide an air flow to help the oil drain. Set the cap somewhere
you don't mind oil seeping onto.

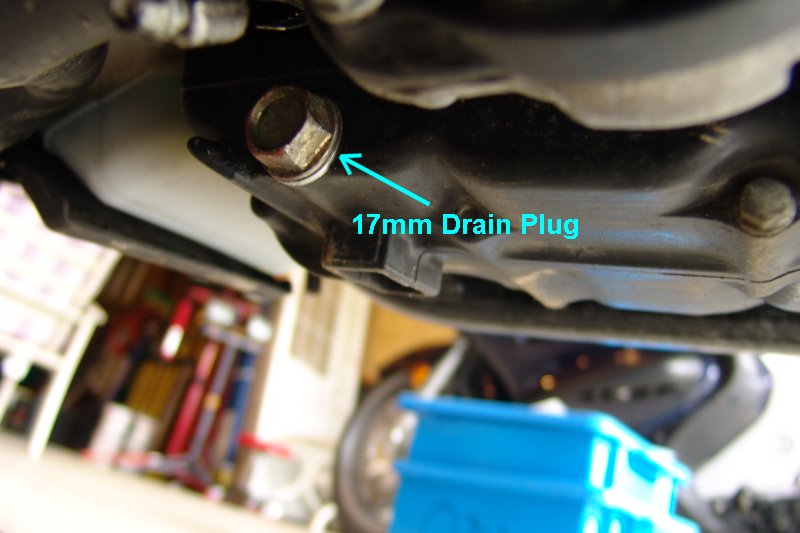
Step 3: Drain the oil
Loosen the oil drain plug using a 17mm wrench, but don't remove. Put the oil drain pan under
the hole (note: it comes out to the side, not straight down), then remove the plug. I just
let it drop down and get caught in the pan's netting and retrieve it later. Let the oil
drain for about 10 minutes or longer if you're not in a hurry.
Step 4: Clear the crankcase oil
Be aware, some people get bent out of shape when I recommend this next part. I have always done
it. Do it or don't do it, it's up to you.
Now you want to blow out the remaining oil from the engine, so with the drain pan fully in
place, you're going to crank the engine, but not start it. To do this, simply pop off both
spark plug wires and just let the starter turn the pistons for about 5 seconds. If for some
reason (you missed a spark plug wire) the engine actually starts, kill it after a couple
seconds. This helps to get the last bit of grimy oil out of the crankcase.
Now let it drain for another minute or so while you replace the spark plug wires.
Step 5: Replace the drain plug
After the oil has drained, retrieve the plug and clean any grime off it. Replace the plug
and tighten until it's secure, but not too tight. Wipe off any excess oil from the plug
or elsewhere.
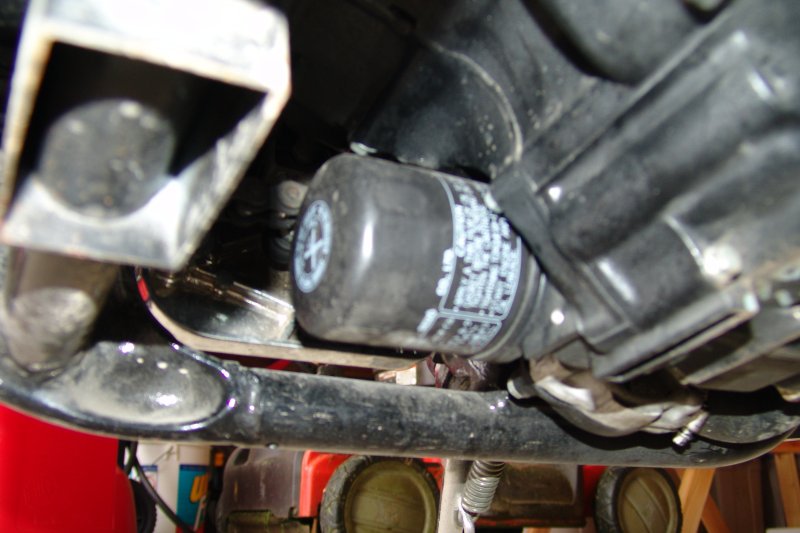
Step 6: Remove the old oil filter
Now it's time to change the filter, which you should do at every oil change.
Move the drain pan over to get ready for you to place the filter in it. Remove the filter
using an oil filter strap wrench (recommended) or if absolutely necessary, a
screwdriver pounded through it. The first filter replace is the toughest, because the factory
over-tightens them. Remove the filter and quickly place it in the pan. A rag is helpful here
in case there is excess spillage from the filter connection point.
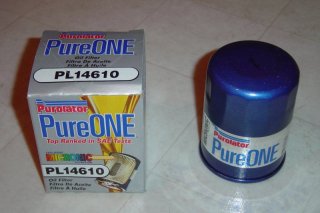
Step 7:Install the new oil filter
Now install the new filter. I use the Purolator PureONE filter PL14610 (not the basic one),
available online and at most auto stores for under $10. If you want, use an OEM replacement
from your dealer (more expensive in general).
Take a bit of the new oil and put it on the rubber gasket of the new filter, then screw it on.
Tighten it until it is secure, but not too tight.
Step 8: Fill the oil
Now you're ready to fill the oil, so put the bike back on the centerstand.
Get a long funnel (I like one with a screw cap on both ends so you don't need to clean it after
every change)...
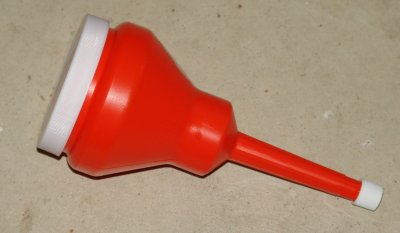
and then slowly pour in the oil into the
fill cap hole. You need 2.5 quarts.
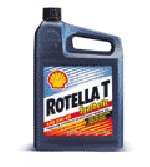
Now, what oil to use? If you're still breaking in your bike and haven't yet
reached the break-in point (1000-2000 miles), use
Shell Rotella T 15w-40 petroleum oil, available at about $15/gallon (white bottle).
If you've already broken in your bike, use Shell Rotella T 5w-40 synthetic oil, available at about
$20-$30/gallon (blue bottle). I've found it at Tractor Supply Company, Autozone and Wal-Mart
Yes, both are automobile oils and both work perfectly.
Again, read this site to learn all about oils
and why you shouldn't waste money on OEM motorcycle oils and filters.

Step 9: Finishing up with the engine oil
Seal up the oil fill cap and double-check the drain plug and filter for leaks and tightness.
If all looks good, fire her up. Let her run for about 10 minutes. Check for leaks again and
if there are none, replace all the covers and the engine oil change is now done.
Step 10: Lubricate the chain
Do this at every oil change, as well as every time you wash the bike. It's very simple, you
want to make sure you squirt just enough oil on every link without applying too much.
The easiest way to do this is to get a long stretch of about 20 feet of pavement.
Start with the exposed chain and apply that, using the paper towel to catch any drips
(if you're dripping, you're applying too much). Then move the bike back a few feet and
treat the next section of exposed chain. Repeat until the entire chain is evenly lubricated.
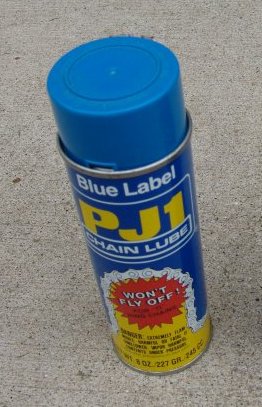
So which lubricant to use on the chain? Here's the best stuff to put back there. PJ1
Blue Label, about $8 at any motorcycle shop. It's designed to penetrate, not fly off
and not corrode.
Step 11: Finishing Up
Run the bike around the block and then come back and check for leaks anywhere you just
fiddled with the bike. If you see none, you're all done.
Please remember to dispose of used oil and filters in an environmentally-proper manner.